How To Improve Old Rolling Stock: Part 1 – Painting

<< Back to Introduction || Part 2: Coupling >>

The term ‘painting’ seems to scare a lot of people. It sounds like you have to know what you’re doing… It conjures up the image of hours of irreversible hand painted craft work or overly complicated resprays with air brushes. Whilst I am going to be doing a tiny bit of respraying, it’s not complicated and the whole job doesn’t require a masters degree in art. Continue reading

How To Improve Old Rolling Stock: Introduction

As you may well know, I originally got this hobby in my teens, being forced to take a break when I ran out of space and went to uni.

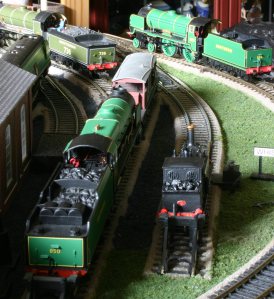
Spin forward 10 years and I now have a large quantity of rolling stock that I inherited from the offset, some of which is really starting to look quite dated and tired held up against modern offerings. The quality of models has improved leaps and bounds in that 10 year absence from the hobby, so this poses a question: How can I bring those old clapped out ‘toy’ coaches in line with the brand spanking new super detailed models on offer today?

IMG_3035

I’m going to take you through a few processes I have been trying out to breath new life into my old stock, in particular this rake of Hornby LMS (Railroad) Coaches.

Beware: I’ve waffled a fair bit whilst writing up this project, it’s quite long! To break it down and to make it easier to digest I’ve broken the process down into three steps:

Part 1: Painting
Part 2: Coupling
Part 3: Gangway Connectors
Prologue: Cost

Let’s Begin: Part 1 >>

Initial Thoughts – location and scale

Loco Yard on the opportunity to start from scratch…

Loco Yard

Locoyard Southern Railway 00 scale models - 850 Lord Nelson, W11 Newport, 736 Excalibur &amp; 925 CheltenhamWhen everything in your model collection is packed up and boxed and you are in a new home, you are given a rare opportunity to rethink everything.  And in my case, a lot has changed, not just in terms of the new home, but also plans for the future.  Previously I had a small section of a spare room to use for the locoyard model railway, but that’s no longer the case.  The new layout will be located in one of three places, the first being the attic/loft.  However, head space is too tight for this to be a viable model railway location.  The second choice would be a shed, but at present there is no shed!  Option three is the most feasible – to use the garage.  This isn’t without it’s challenges.  One challenge will be improving its security, another checking the electrics are ok.  The garage will not…

View original post 621 more words

Langstead – Episode 23: Brace Yourself…

Today I drastically changed my layout. Not in a way that has changed the track plan nor altered the scenery as I have done in the past… No, today I joined my two base boards together.

Why is this such a drastic change? – I hear you cry. And for those just joining this story (and hello, by the way) you might be wondering why my layout was in two halves and wasn’t joined together already?

Original design concept showing how the track would be laid across two boards.

Original design concept showing how the track would be laid across two boards.

Well all the way back at the beginning I implemented this design for two main reasons: Continue reading