
<< Part 1: Painting || Part 3: Gangway Connectors >>
One of the main reasons for embarking on this little project was to sort out the spacing between the coaches. Whilst the old Lima/Hornby D-Ring type tension locks are functional, they have since been superseded by slimmer and more compact variants that leave a more realistic spacing between rolling stock.

Image from Hornby
The majority of modern OO Gauge rolling stock is now fitted with NEM pockets, a standard design used across manufacturers so users can interchange their coupling types.


Above are a range of different types of coupling we could use that would provide a closer, more realistic coupling than our old D-rings. Unfortunately it’s not a case of simply gluing the new type of couplers in place of the old. You first have to retro fit some spring loaded NEM adapters. If you didn’t do this then the close coupling suddenly becomes too close when going round curves. The sprung mechanism effectively increases the spacing temporarily whilst traversing a curve.

Oddly such adapters seem fairly sparsely available from all the usual UK outlets. Your best bet are these from Symoba available from DCC Supplies….

You’ll need to buy both the sprung loaded mechanism and then a NEM pocket to attach to it.
Warning: to fit the adapter you are going to have to do some irreversible surgery to the bogies on your stock by cutting off the old D-ring block which will almost certainly be part of the moulding. I will stress that the process is easy to do and is guaranteed to work with these Railroad LMS coaches, as it probably is with other Hornby Mark I’s… BUT do read through this section before you go hacking away at your bogies just so you know what it entails. For me, as this was a learning process, I wasn’t too bothered if I lost one coach if it all went pear shaped. I did however make a point of finding out if I could replace the bogies if it was that disastrous. Of course these being very common models, replacement bogies are readily available. This is worth checking if you are particularly attached to your old stock.
Firstly remove the bogies from the under frame. With Hornby models they’ll pop in and out with ease.
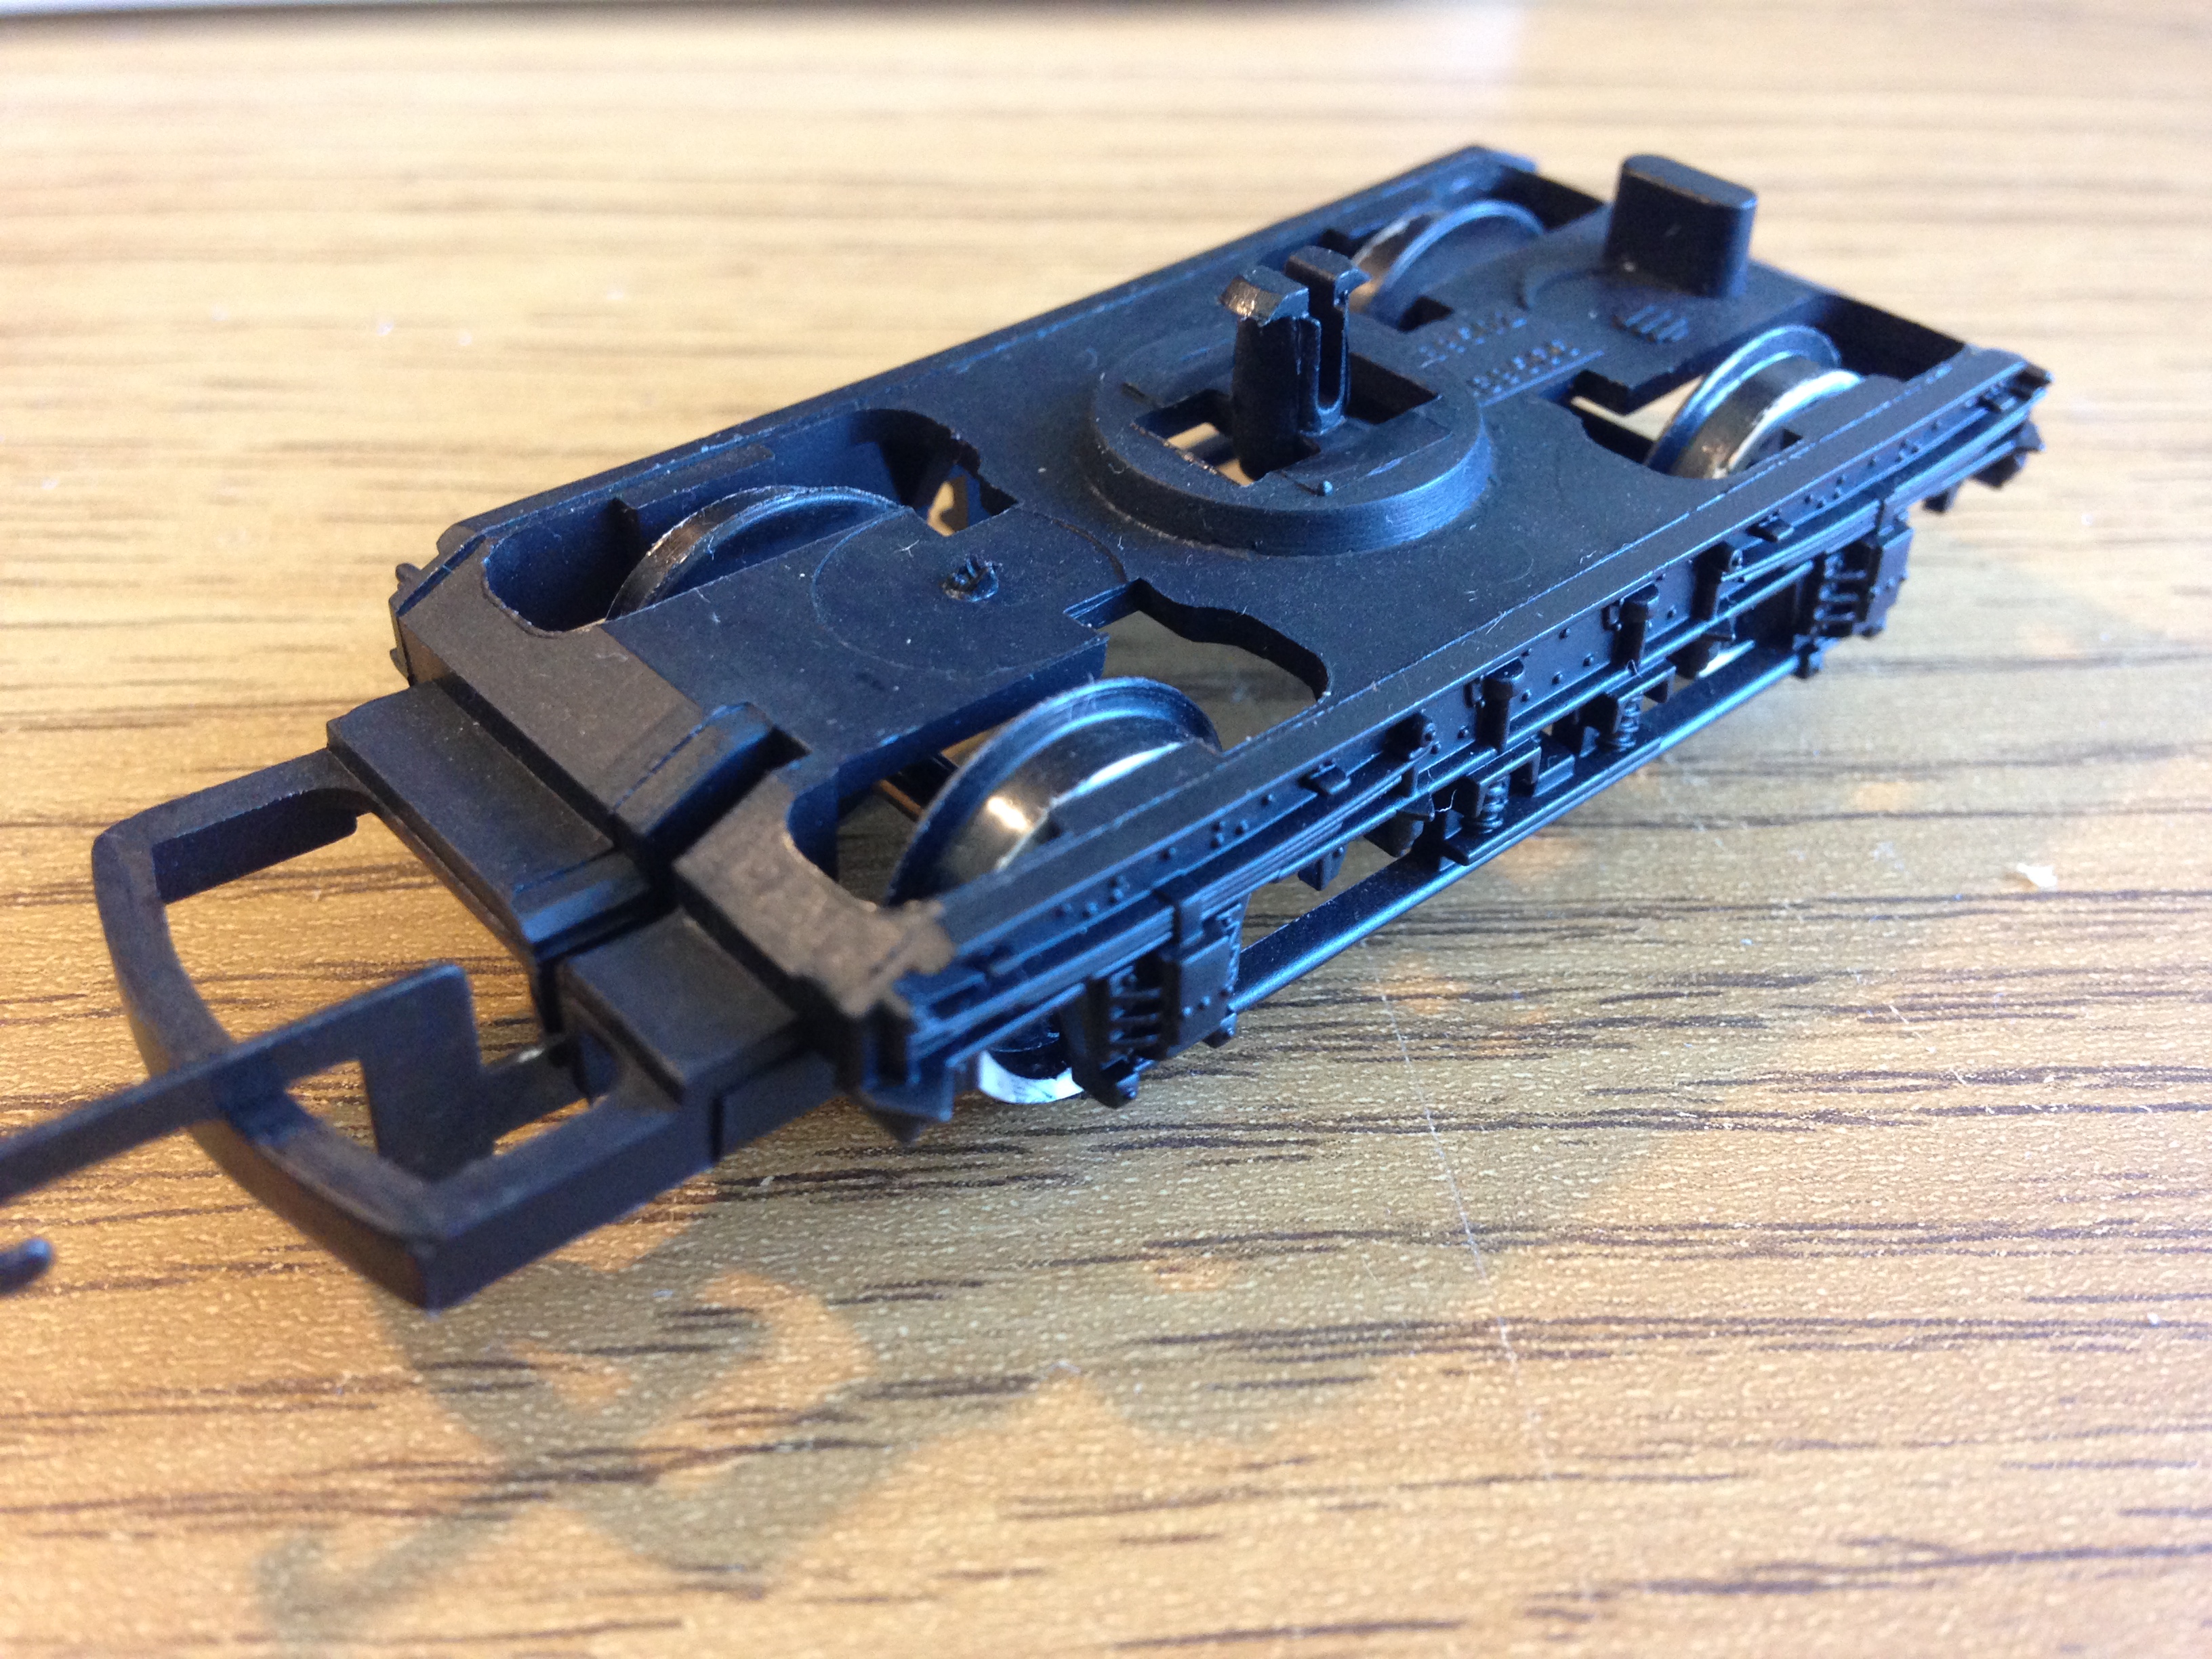
Remove the D-Ring coupler by making cuts as shown below.

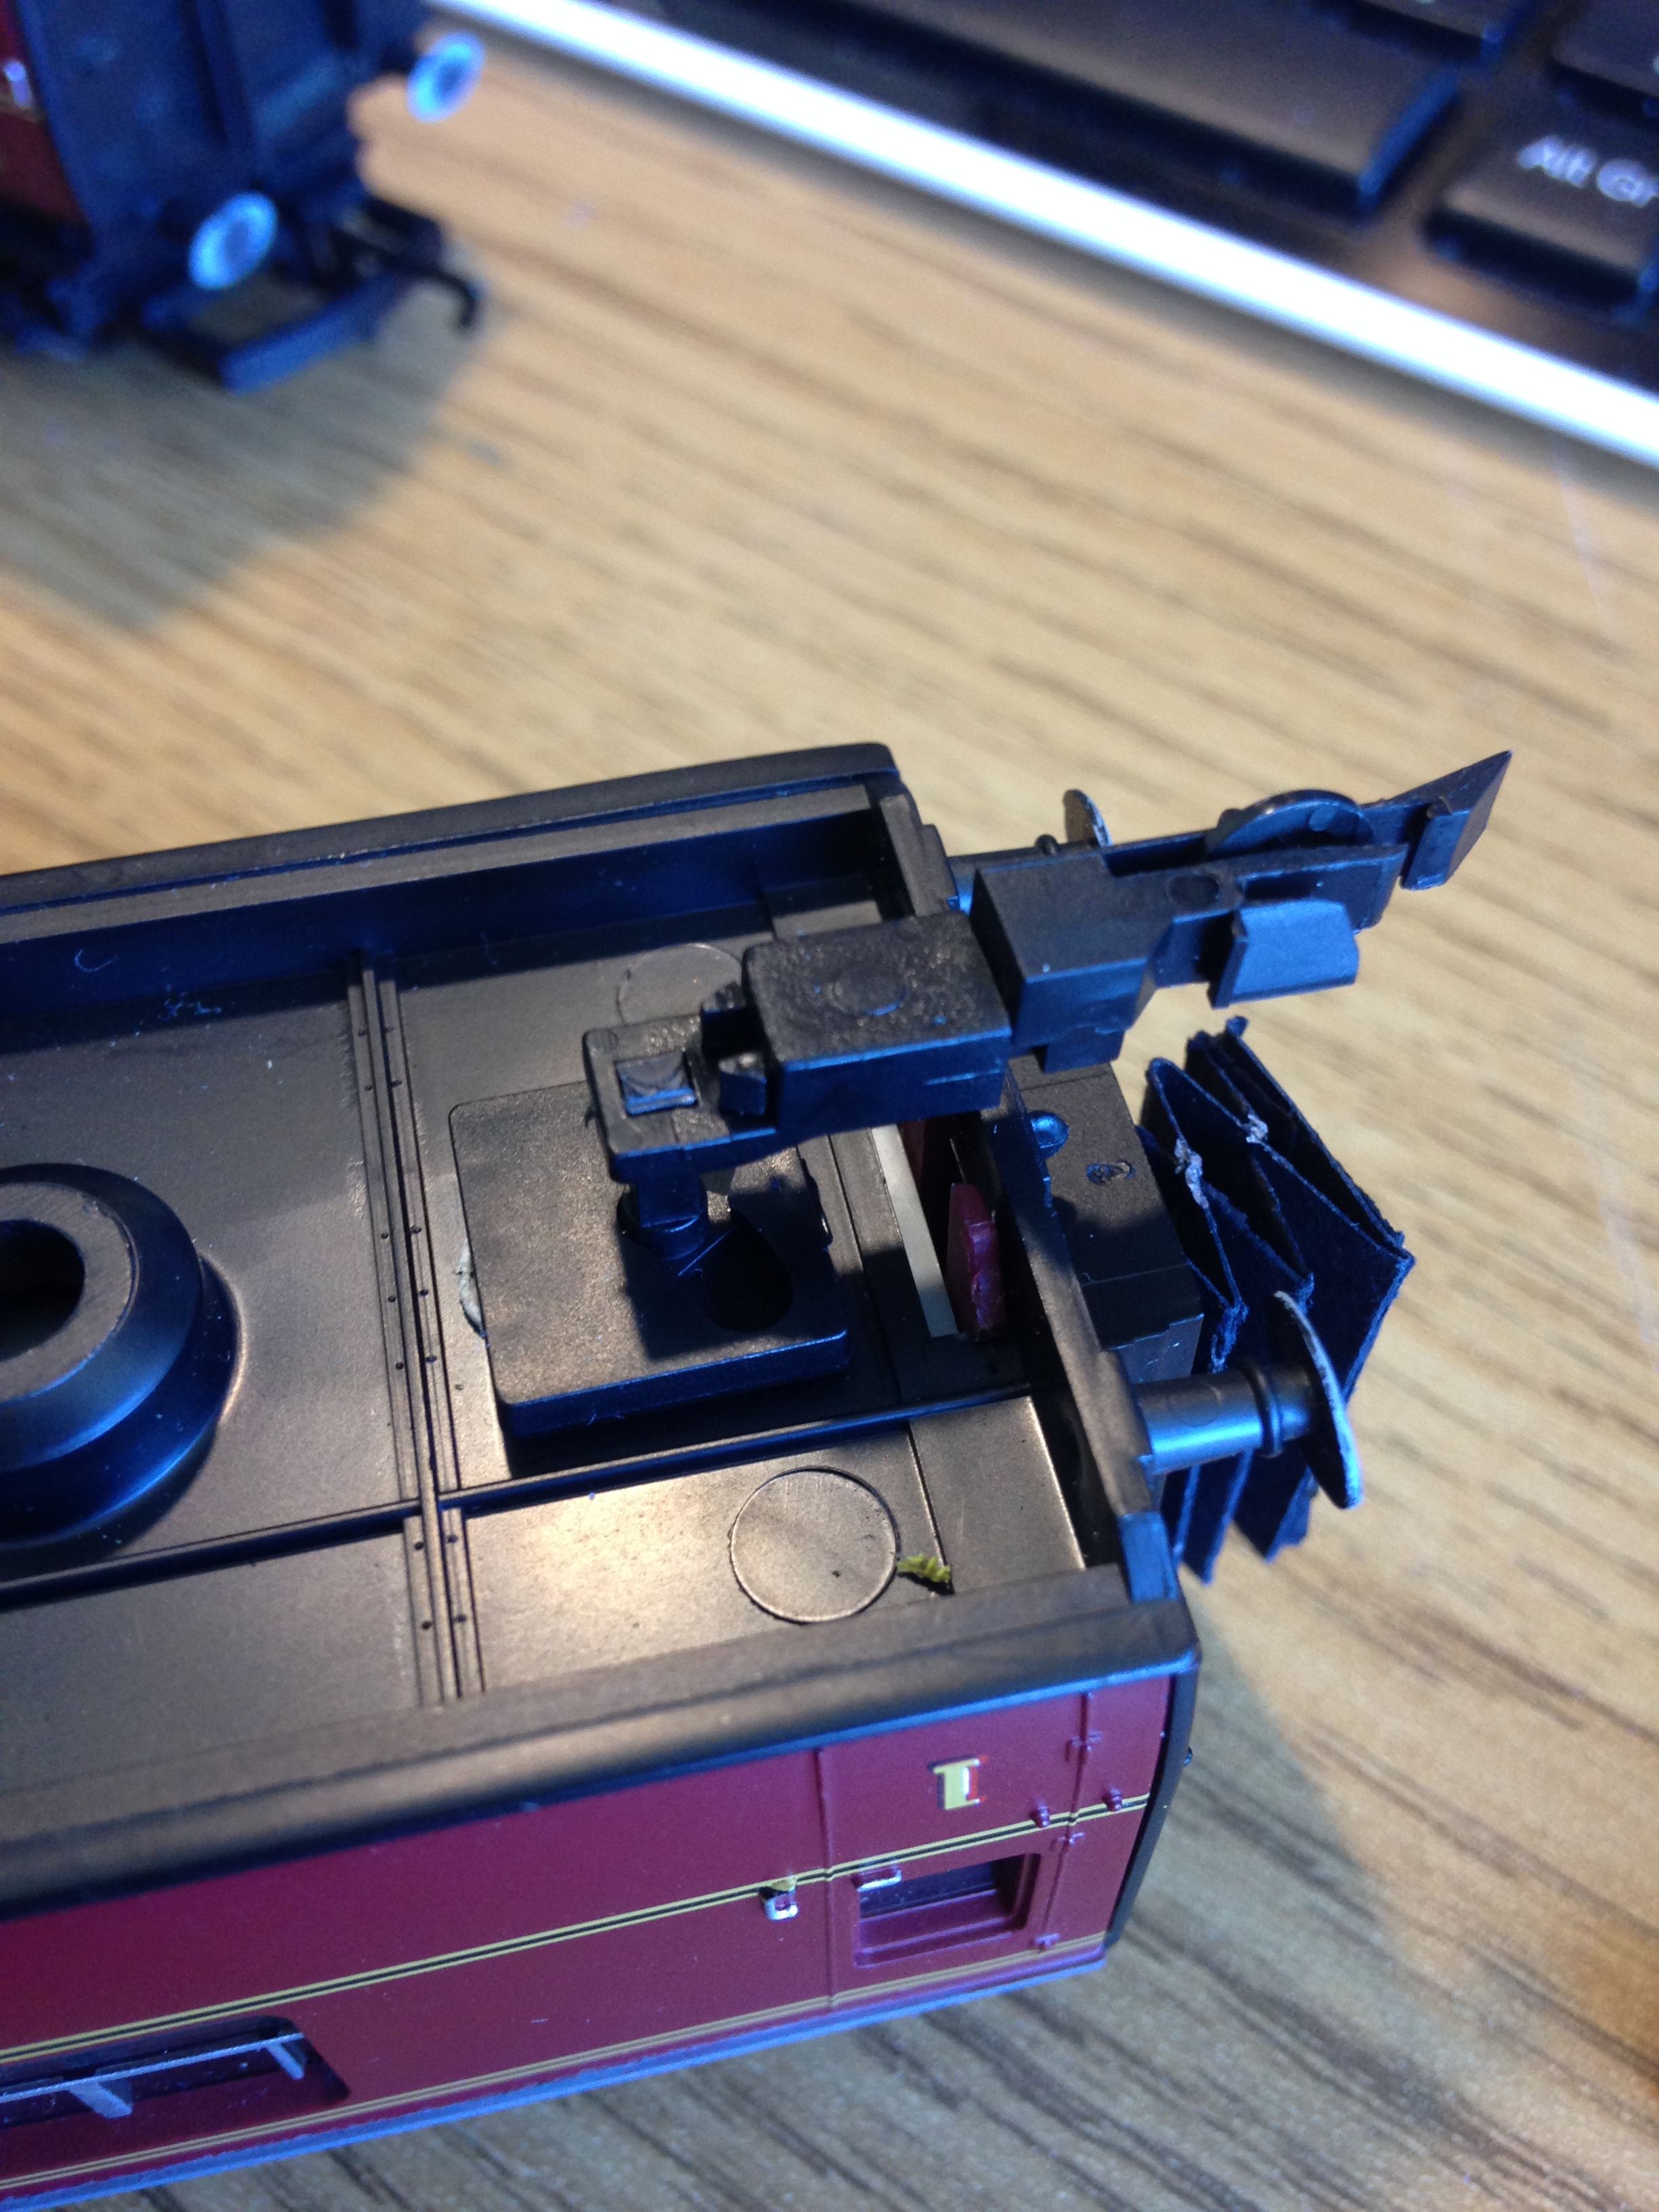
Fix the spring mechanism, the NEM pocket and your chosen coupler together. Incidentally I’m using Hornby’s close couplers as I like their look and they are easier to operate than tension locks. You may need to trim back the pole on the spring mechanism.

Fix this to the underside of the bogie. Use blu-tack first so you can experiment with positions.
It may look like the spring mechanism will interfere with the wheels but remember the coupling moves with the bogie round tight curves. Under testing, they do rub together slightly but only when uncoupled and only on first radius curves. You may wish to leave the D-rings on or not fit the replacements at the non-locomotive end of the rake as a result.
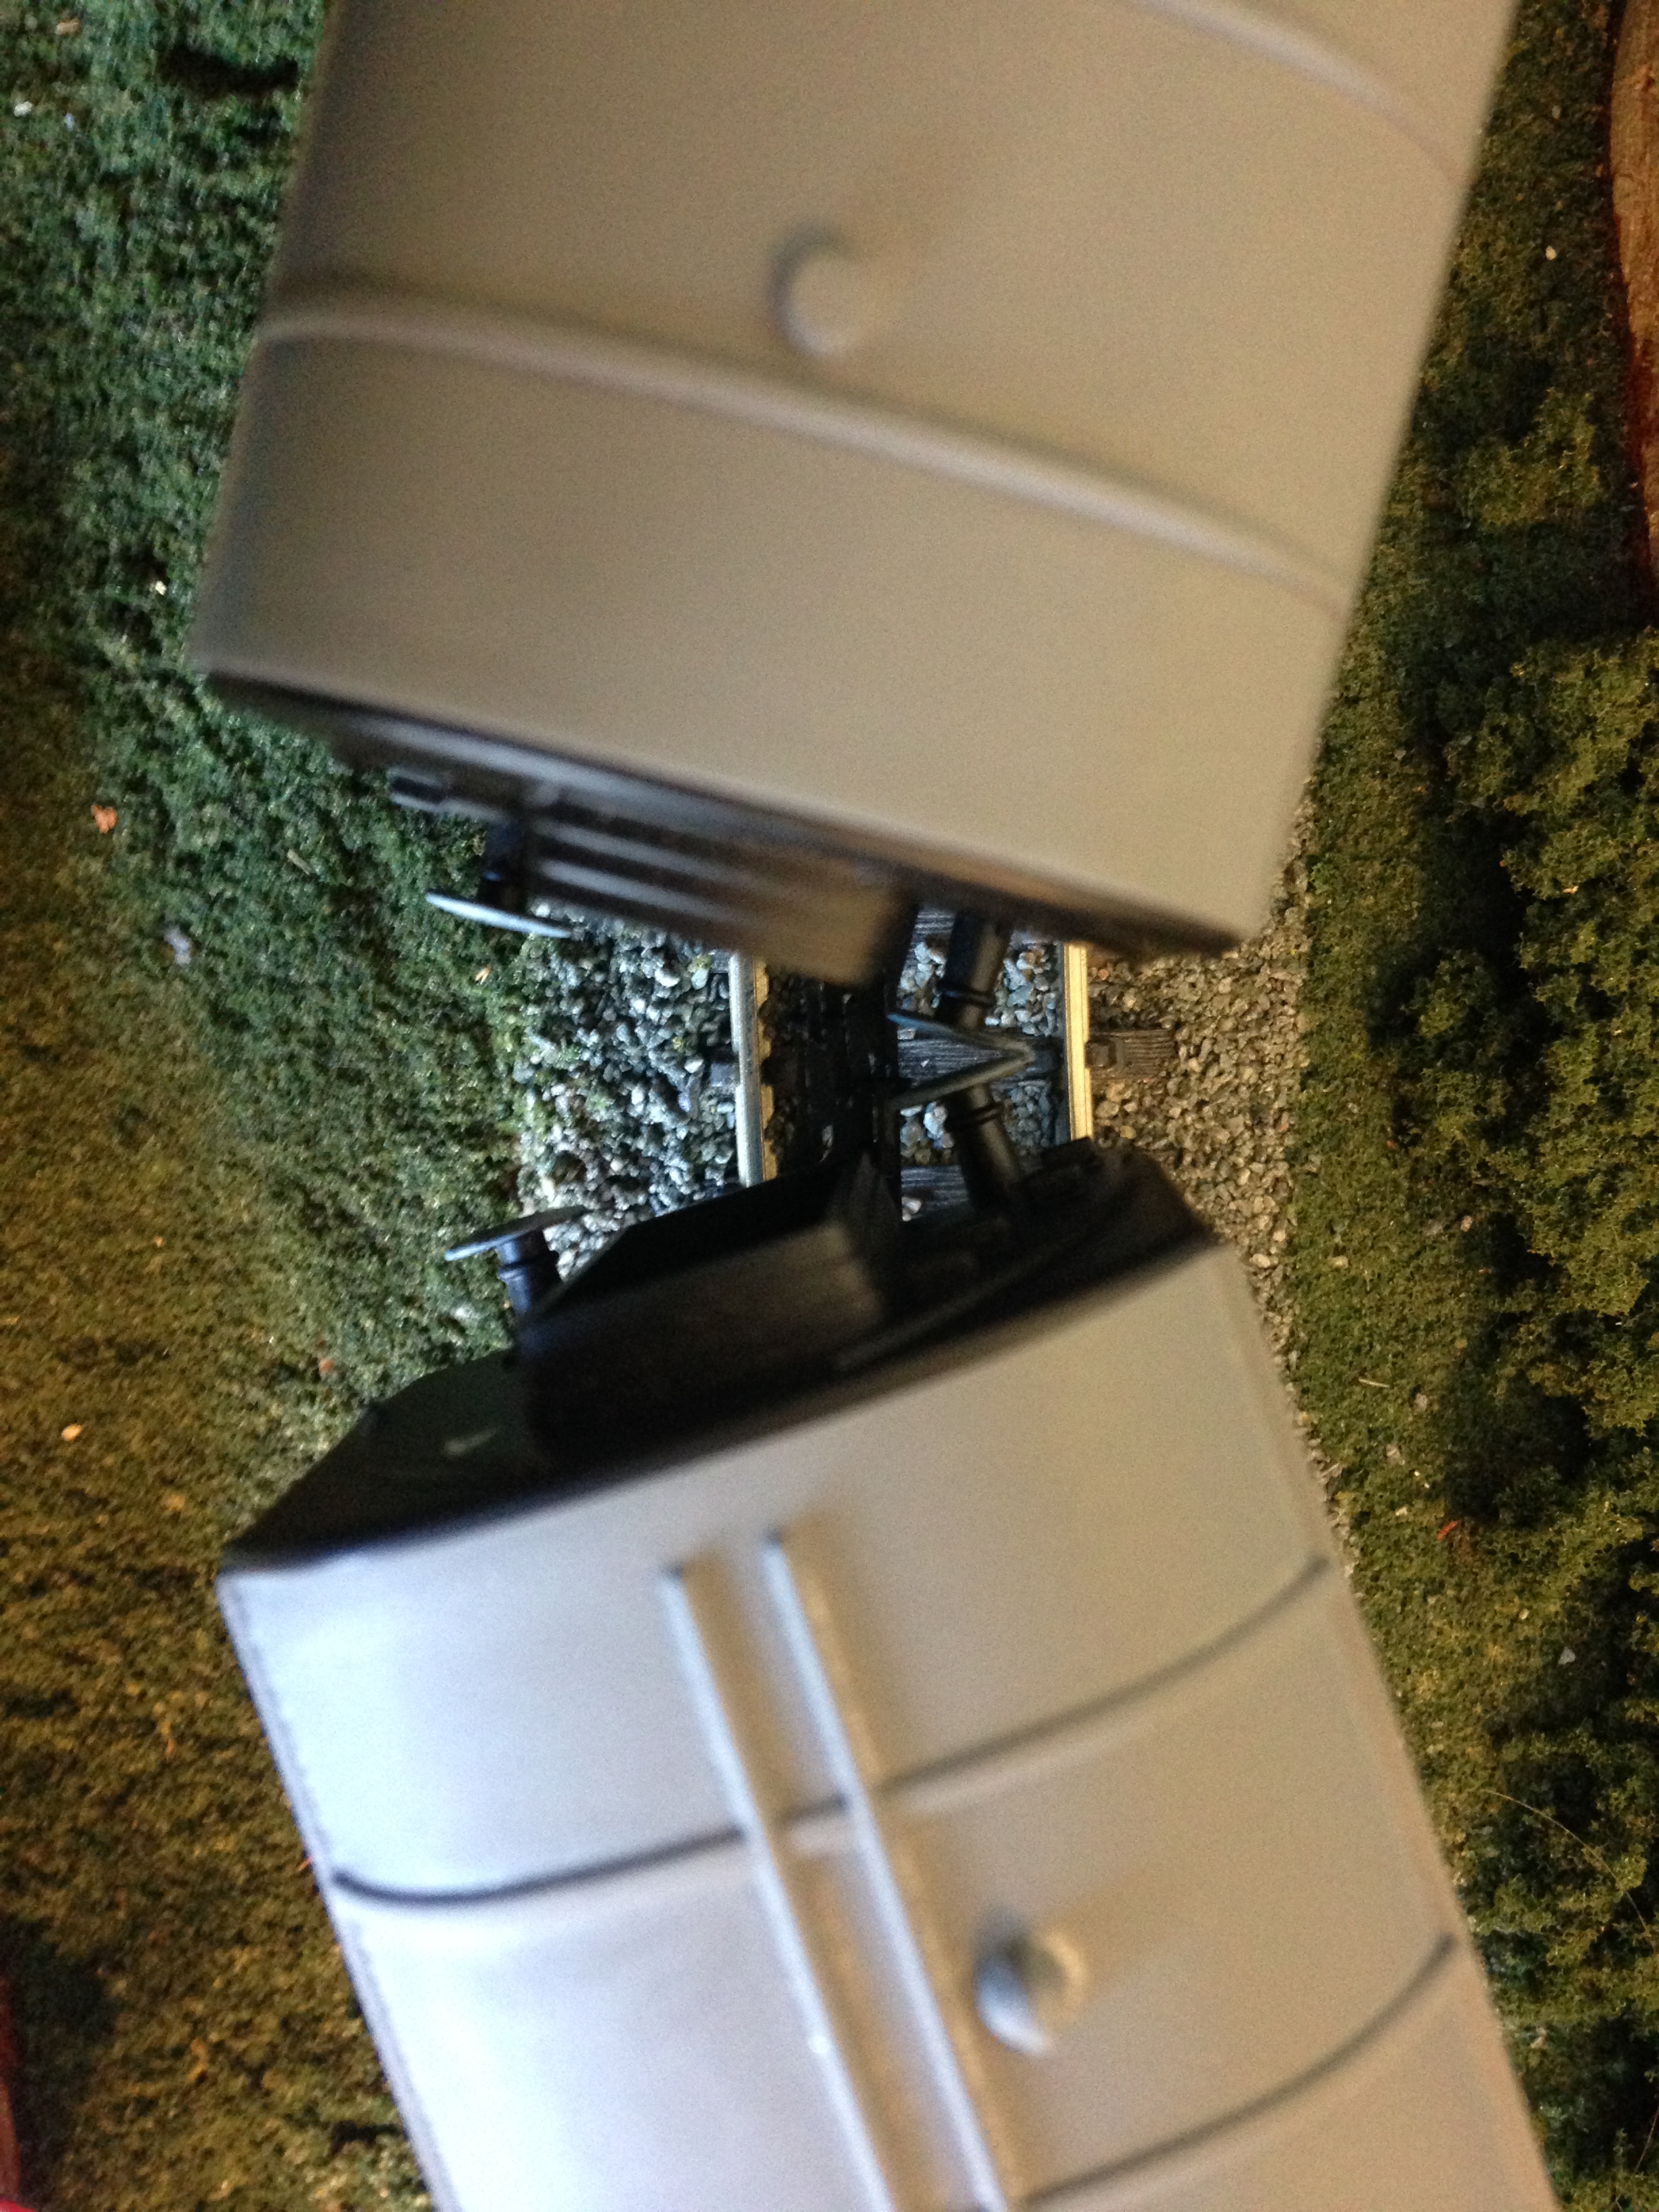
Repeat the process with another coach and start experimenting with positions. Make sure the coaches do not touch whilst traversing the tightest curves they will run on.
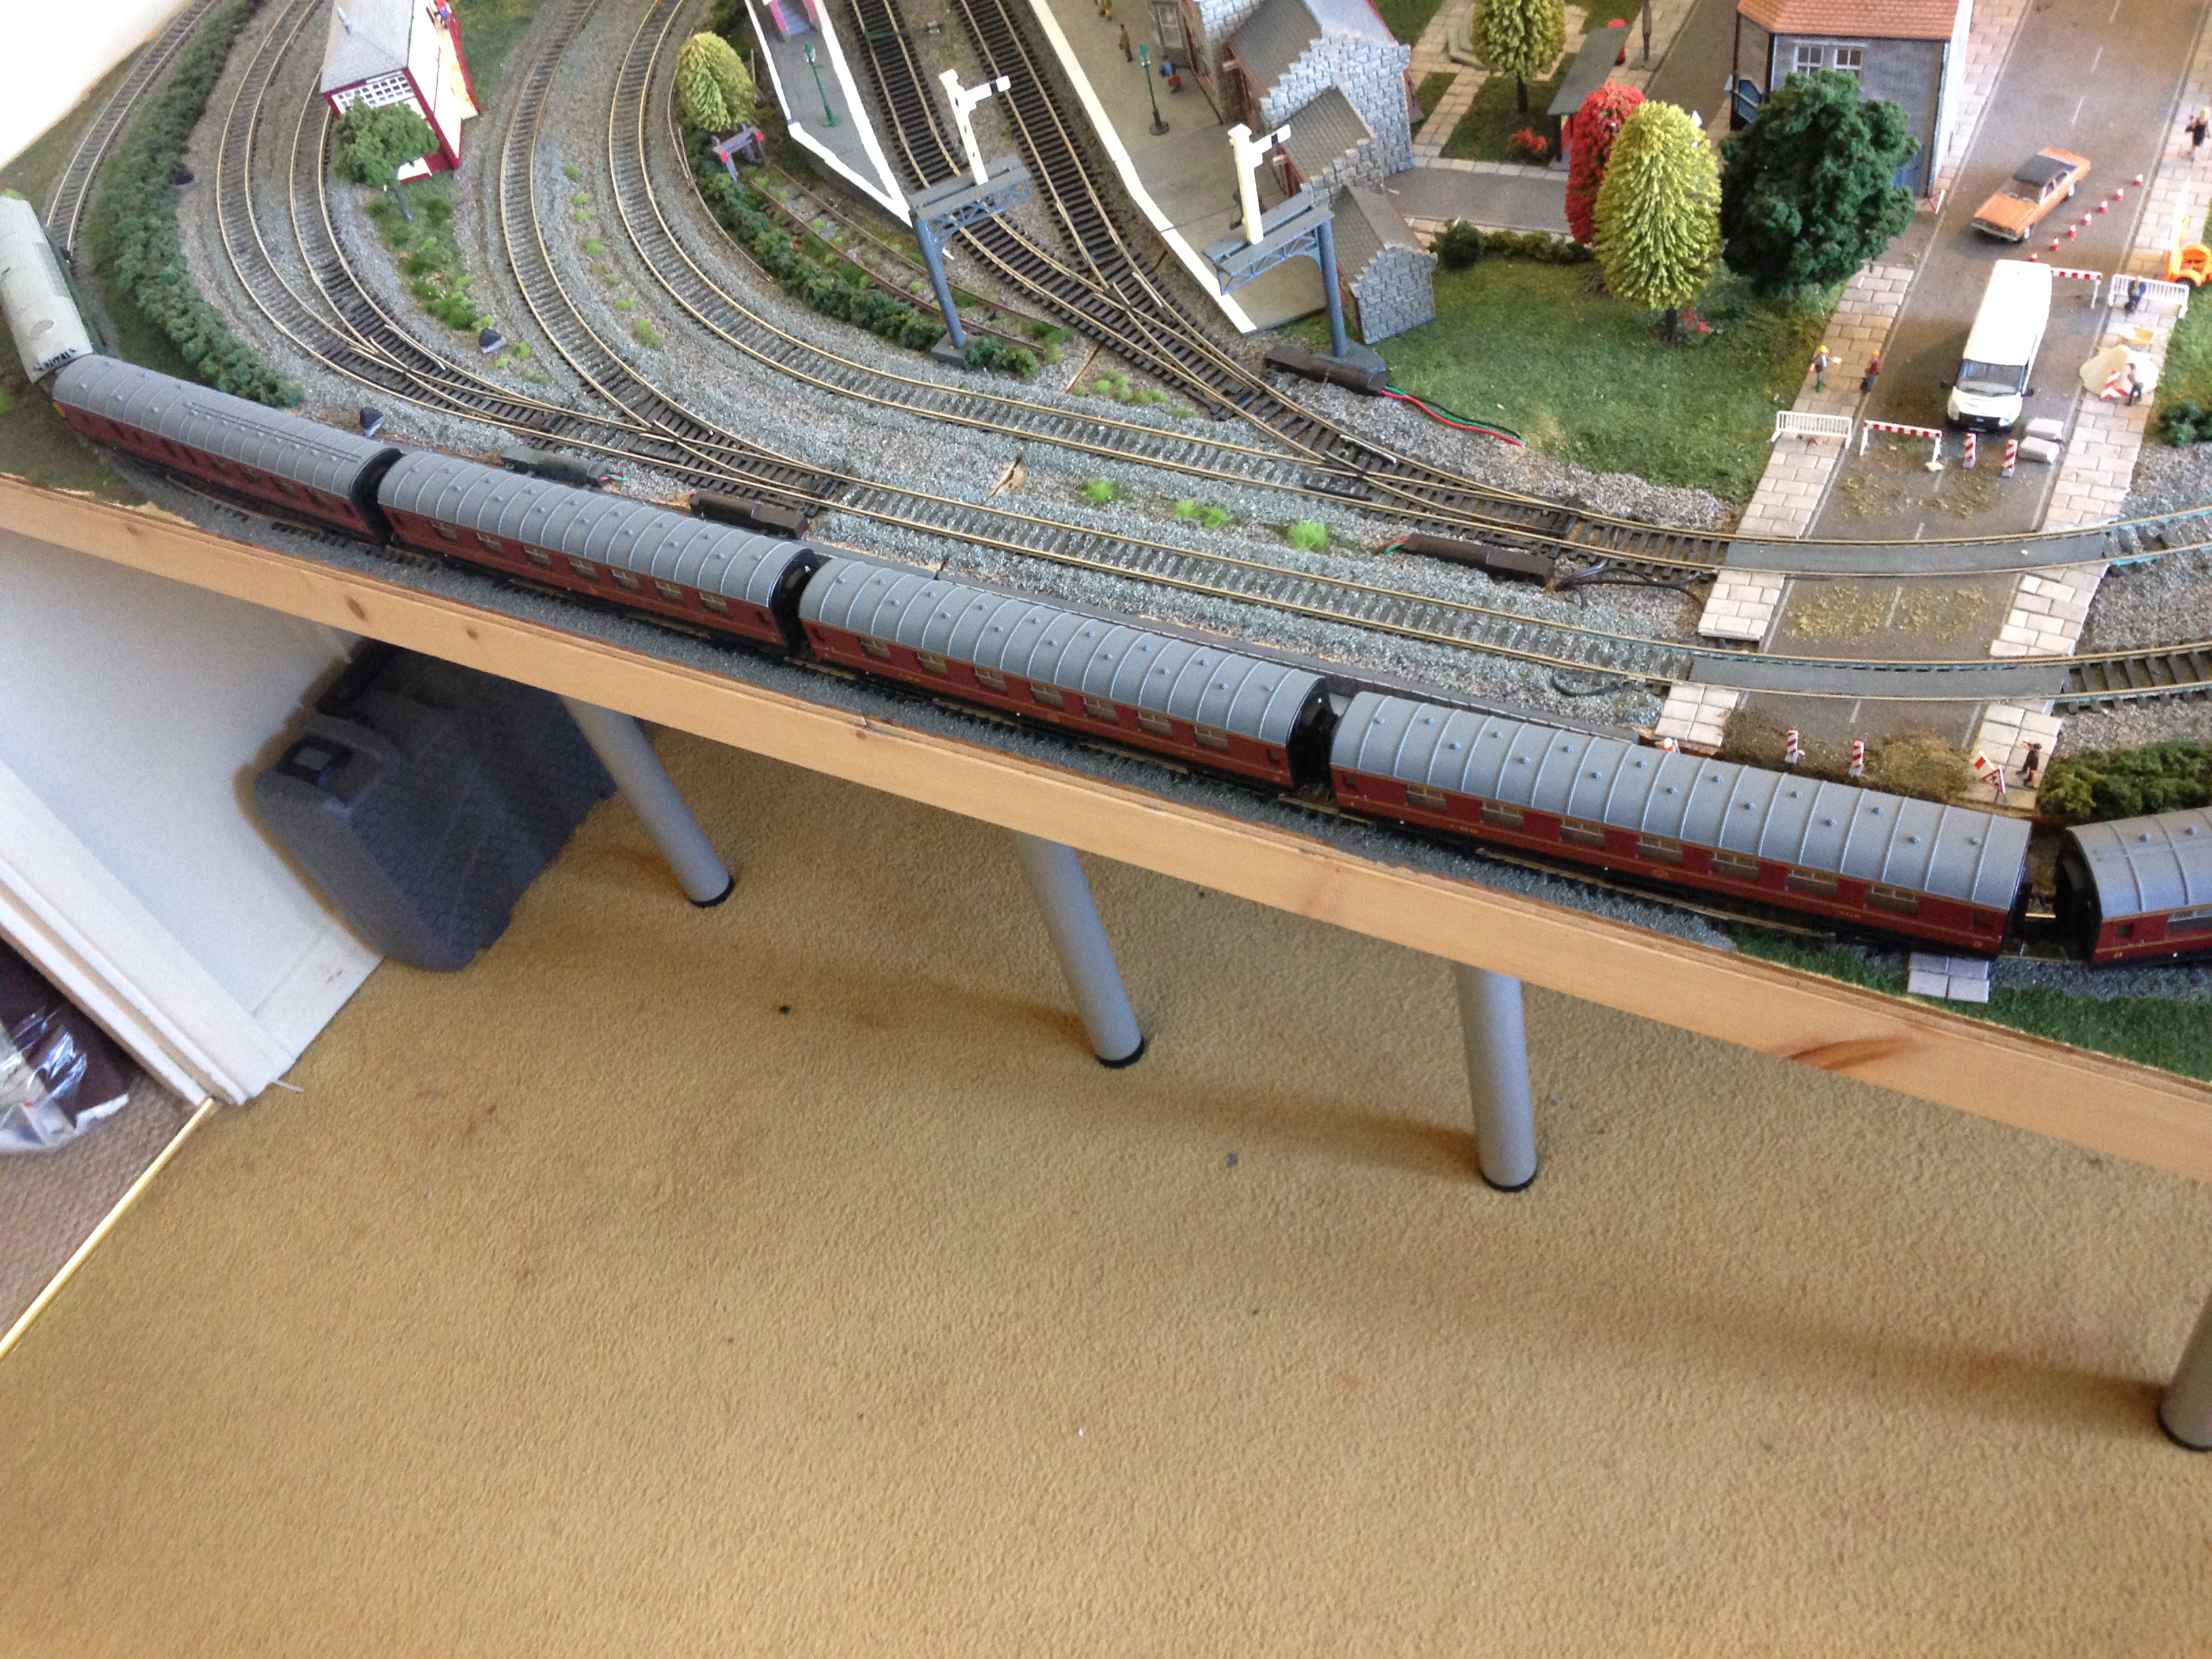
Tip: I would highly recommend leaving the blu-tack in place for a few days before gluing. I always find teething problems may not always surface on your first, second or even third test run.To aid this process, test the coaches on a number of different tracks, loops and sidings. Once you’re completely happy they run as they should go ahead and glue the spring mechanism to the underside of your coach. You may want to keep the blu-tack in place for the next stage as well…
In a nut shell that’s it! You can see the spacing has been greatly improved… and the next step is going to put the icing on the cake!

[…] << Part 2: Coupling || Prologue: Cost >> […]
[…] 1: Painting Part 2: Coupling Part 3: Gangway Connectors Prologue: […]
[…] << Back to Introduction || Part 2: Coupling >> […]