Design:
After hours on the internet researching Model Railways I decided my layout needs to have certain criteria:
- Probably the most important of all: The Layout should be easily dismantlable/storable. I live in a smallish flat in London now and with other people so there really is no room for a permanent fixture.
-
Despite this limitation the Layout should be as big as is logically possible to make the most out of all the existing track (Hornby) I have and so that I can run at least 2 trains with more in sidings. This presented two further limitations:a) The board(s) need to fit in my car. This is mainly to aid in moving it when I move house, but also just in case it’s good enough to take to an exhibition!b) It needs to fit somewhere in the flat, and it will be sitting on our extended dining table when out. Soit can’t exceed certain sensible dimensions.
- It should be easy for me (a relative novice at DIY) to build. However, it should still look as good as possible whilst maintaining a modest budget.
- It should be easy to set up and set down.
With these in mind it was back to the world wide web.
If I’d have google’d ‘Model Railway Base Board’ when I was younger then maybe we wouldn’t be in this mess. Well it turns out there are plenty of companies out there that will professionally build you a base board, which could fold in half or split for your convenience and in some cases lay down scenic felt.
This would certainly fulfil the ‘Look good’ rule, and all could be made to measure which fulfilled ‘Fit in car,’ ‘Fit in flat,’ and ‘Have lots of track.’ However these certainly were expensive and did take away a little of the ‘Make myself’ element to the project.
I therefore elected to go to B&Q and buy some wood myself. This would be cheap, and I also knew from previously purchasing some MDF to cover up my window to help me sleep during the day after working nights, the exact dimension that my car will accommodate. This lead to the parameter, 3.5ft by 2.5ft. This is big, but not big enough for a layout. I would therefore buy two of these, seperating the board in half when storing the layout which gives me 5ft by 3.5fto work with. Perfect. Now we just need to work out the layout itself!
A very useful website I found was http://www.freetrackplans.com. Name sort of does what it says on the tin. It gives ideas on Hornby track layouts on certain pre-given sizes. If you go to the geometry section of the website it also gives advice on curve diameters – which played a part in helping me confirm the size of my layout. If this wasn’t enough help FreeTrackPlans also links you over to a program called ‘AnyRail4.’ Which is a free* track planner tool you can download.
*Free up to 50 pieces in layout.
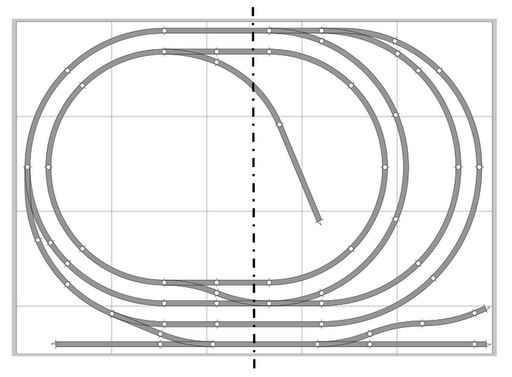
So I set to work , setting my project to be no more than 5ft by 3.5ft and this is what I came up with.
 |
| Layout |
The dotted line denotes where the board splits in two. I plan at this point to nail down anything that doesn’t cross this dotted line and keep the middle straights lose for easy dismantling. This setup also allows for a great deal of future proofing. In theory another piece of wood can be added in the middle when/if more space becomes available to me.
The layout features two ovals (Hornby 1st Radius & 2nd Radius) so two trains can run simultaneously. It also features 2 outer loops meaning at least one (preferably two) other train can be held here and alternated with the running one. The right hand side of the inner oval can be isolated by points, meaning a train can be held here whilst the siding in the middle of the board is accessible from the outer oval. All these options add for lots of flexibility, lots of trains and without complicated powering scenarios.
The long term goal will be to have a town scene in the centre of the board with a modest village style station occupying the straight section of the track towards the bottom of the oval. The siding will act as a wagon yard for the station. The sidings at the bottom of the board will allow for further stock storage and possibly some depot style buildings. At this point I will mention that I do need a liiiitle bit more track (for the 3rd radius curve) which is slightly depressing as I have ALOT of other spare track left over. However, this layout looks like it will really work so I’m going to run with it. Off to B&Q Leah and I go.
 |
| Ply Wood |
I opt for 12mm ply wood. To make it seem like I made an educated man-decision this was because I felt MDF would probably put up a fight against a measly track pin. However it will still be durable and strong. Sundeala and Chipboard were also options however I’m told by google and model railway forums that these are prone to warping in heat fluctuations if not built on a frame. I’m not going to build a frame, mainly because this means more money on tools – but more it’s a case that I can’t be bothered. It’s useful to note that my flat has recently been fitted with a new boiler freeing up some storage space. and providing a location to store the boards at a constant temperature.
Thankfully B&Q will helpfully cut your wood to size. Although the annoying bloke at Beckton Park will be confused as to why you don’t want the offcuts. Why do I need them?!
On return to the flat I set up as much of the layout as possible (minus the missing extra track at this point) to gauge an idea of how it was going to look.
 |
| Track Rubber |
 |
| Top Rail: Clean Bottom Rail: Dirty |
First of all though, the track needed a damn good clean. It had amounted 6 or so years of premium grade dust and was hindering the running of trains to a mere stutter (much like the central line if you lean on the doors). To clean them I used Hornby’s track cleaning rubber. Luckily I already had one, and despite me thinking it might have disintegrated over the years it still performed the job perfectly. (I’m also surprised that the changing temperature in the previously mentioned parents loft hadn’t damaged the track. The day I collected it was sweltering!).
 |
| Track Laying |
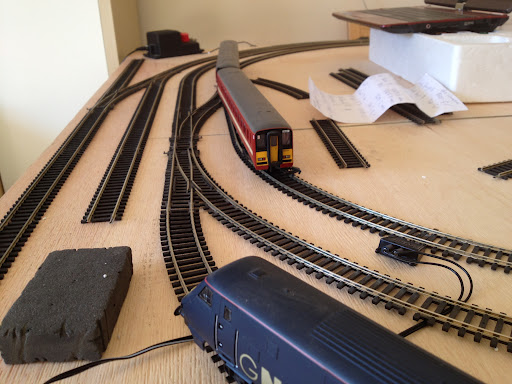 |
| BR Sprinter |
Track was laid and trains were run. The BR Sprinter smoked a little on start up. (Yet more dust) But once run it was fine. All the other trains now worked very well on the freshly cleaned track!
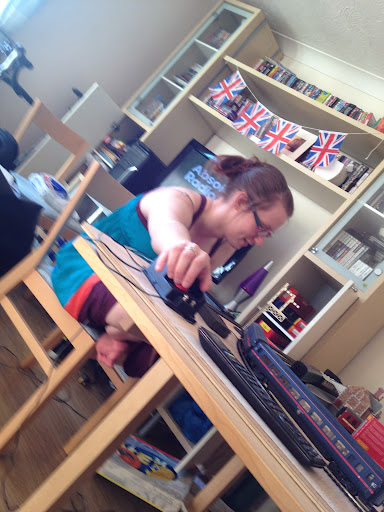
Leah jumps in and decides that Model Railways are definitely fun and sits there for a good 5-10 minutes making DLR announcements. Bless.
 |
| At Cutty Sark – The first two sets and last to sets of doors will not open… |
You’ll notice at this point that I have very ‘modern’ trains, an exBR Sprinter, an East Coast Mainline 225 (in former GNER lively) and an EWS loco. Most modellers try and set a theme/locations or a period for their models. Whilst I have modern trains running here, I do have steam too. My cunning plan is to make the town scene as neutral as possible so I can run either if I want to have a theme.
So now we have a board. Lots of trains. And nearly enough track. The next stage is figuring out what material to use to cover the board and how to do it!

